Building a rack for maximum redundancy
It's really easy to get caught up in designing your network to have redundant links, dynamic and self-healing protocols that allow maximum throughput but completely ignore the actual infrastructure bit of it all. The power sources that keep it running, the screws that hold your switches in place, the patch panels, these all matter to make replacements and upgrades easier and faster with less downtime.
My job working for a reseller has me in different network closets all the time and what I see runs the gamut from really good design to really bad design and everywhere in between. Largely, most network closets that I see were designed with no thought to the outage or effort required to replace the equipment.
This post is going to focus on what I consider to be a very typical access closet design. From a switch hardware point of view, I'm going to assume that you're using 1u switches that either stack together or are configured as standalone switches. Some of this advice is also applicable to chassis switches as well.
The Rack
Some of this advice is only applicable in a new build where you can specify exactly what you as a network engineer want in your closet and this is one of those items. It mainly boils down to 2-post vs Enclosed rack. There are arguments to be made for both but in general, I prefer a 2-post rack for access switch closets.
The argument for an enclosed rack is that it can be more secure if the room itself isn't secure and also, these racks can accommodate full depth servers in cases where there is local compute, storage, or camera NVRs. As well, your access switches may be in a data center that already has enclosed racks. The argument against using an enclosed rack is that they're generally harder to work with multiple people on the same side of the rack, cable management tends to be more difficult, certain switch models do not have rack rails and mounting switches with rack-nuts is a serious pain in the ass, and enclosed racks require a larger footprint that may be unsuitable for the closet that you're building.
The above negatives are why I prefer 2-post racks if there is a secure room. In the case that the room isn't secure, but you would like to use a 2-post rack, you could consider building a cage around the rack. Be sure to get models that have mounting screw holes on both sides, holes in the sides to allow for cables to pass through and rack units marked on the front and back.
If a standing rack doesn't work for you either, you can consider a wall mounted model but be sure to get one that is deep enough for your switches and can still accommodate power cables in the rear, is strong enough to handle the weight without sagging, and has a perforated front to allow for airflow. I also prefer models that allow you to remove the sides and swing the entire rack away from the wall to access the rear. Tripp Lite makes my favorite wall mount enclosures.
If you're racking switches into enclosed racks that have square holes, I highly recommend Rack Studs. Traditional rack nuts are a total pain to work with because they either won't go into the hole to begin with or they get knocked out too easily while you're trying to mount your switches. Rack Studs are a product that make the whole process easier and allows you to mount a switch without tools.
Power
This is actually the section of this post that inspired the whole thing because I feel as though not enough attention is paid here. Very often I see the thought process of "we put in a UPS so this switch is never going to go down" and it couldn't be more wrong. I can't count the number of outages I've responded to that were the result of a UPS failure and the entire switch stack was single homed to just the UPS as its power source. I'd be willing to bet that a UPS will fail before your switches do. The answer to solve this depends on your level of risk and how much you're willing to spend.
The ultimate answer is to buy switches that have 2 or more power supplies, preferably hot swappable, with on power supply on "street power" and the other on a UPS with a generator backup. This should keep your switch up in the case of either a power outage or a UPS failure.
In the case that you can't afford the luxury of multiple power supplies, consider installing a PDU with an Automatic Transfer Switch. While it's not as redundant as multiple power supplies, it protects against the failure of one of your sources of power. An ATS looks like a regular rack mounted PDU but has 2 power cables. One power cable connects to "street power" while the other one would be plugged into a UPS. The downside to this approach is that the ATS itself is now your single point of failure.
Further still, certain switch models have the feature to share power between stack members with a special cable. This can help if you have uneven POE draw among member of a stack but also help in the case of a single switch losing power.
To help mitigate against the human factor of mixing up which black power cable is which, you could consider buying different color power cables for your A and B circuits.
Cables and Patch Panels
This may be one of the more controversial topics in networking, mount all of the switches grouped together OR alternating patch panels with spaces for switches to be racked between them. I have done it both ways and I've found that there are pros and cons to both.
The proponents of mounting the switches between patch panels will tell you that you need shorter patch cables, it's easier to trace a cable from the switch to the panel and that it looks cleaner. While they are correct in this, too many people do it incorrectly. To build your rack correctly, you need to leave 2 rack units between each patch panel, and you need to mount your switches from the rear not the front.
Without 2 rack units between panels, you can't mount a replacement switch without first removing the existing switch. This may not seem like a big deal but if you have multiple VLANs on a switch, it can be difficult to get the cables back into the correct port. Additionally, if you don't rack the switch from the rear, you have to first remove all of the cables from the existing switch to slide the new switch in. It's easy to mount a switch from the rear of a rack by just flipping the ears around. If you don't do these two things, I do not agree with this approach. Additionally, it should be noted that because the switches are physically spread further apart in this design you may need to purchase longer stacking cables to connect them.
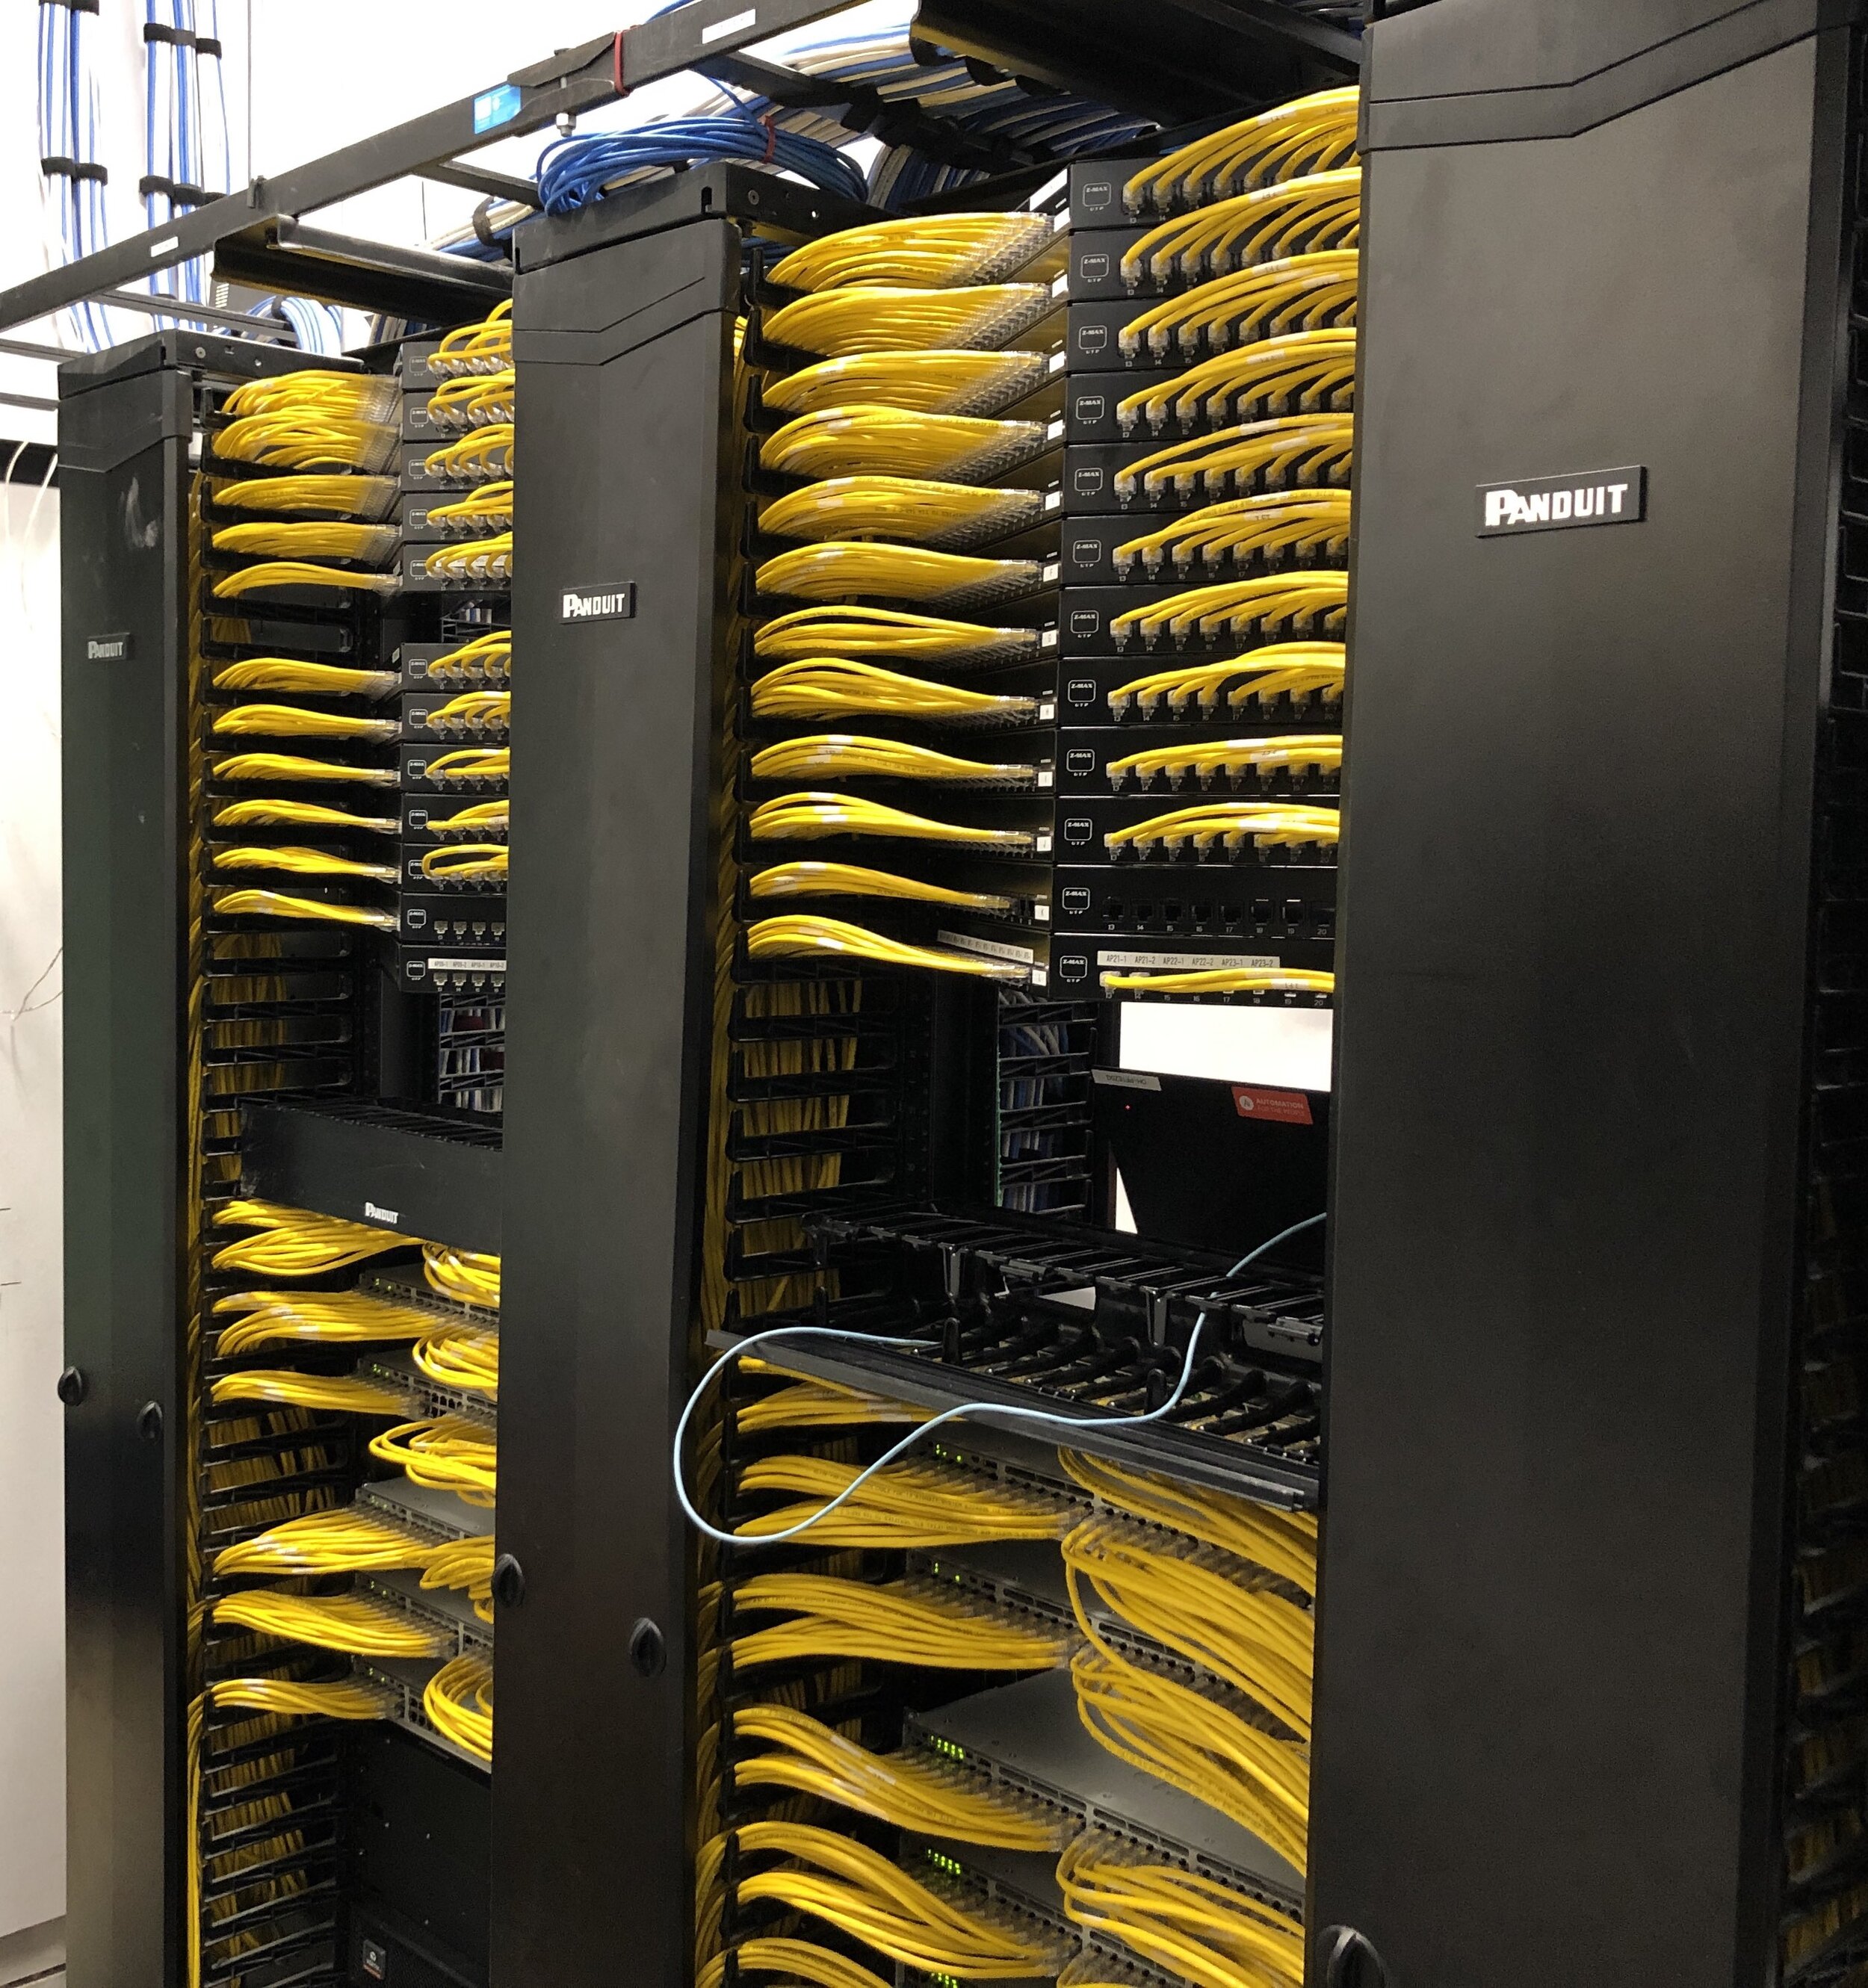
If you can't mount your switches from the rear for some reason or you're using chassis switches, you're going to keep all of your patch panels grouped together with longer patch cables connecting to the switches. To do this design, it's important that you invest in proper vertical cable management. 6-inch wide managers should be the minimum width with strong fingers to support heavy cable bundles. Go with a wider cable manager if you have two adjacent racks with multiple switches each. I really like Panduit’s line of cable managers because they’re large and I like that doors lock in securely and easily and the fingers are wide enough and strong enough to support a large bundle of cables.
When connecting patch cable between panels and switches in this configuration, I like to keep split the panels in half and have one bundle of cables go to one side while the other half goes down the other side of the rack. Additionally, to keep my bundles neater, I try and connect ports from the interior of the patch panel to the exterior ports on the switch and then work my way inward. This prevents cables in a bundle from having different amounts of slack.
This brings us to maybe the next great debate in building network closets is the Velcro vs zip-ties debate. I've got to say that I think this is obvious, Velcro allows you to make adjustments and add new cables to a bundle. I like zip-ties for structured cabling on the back of the rack that will not move very often. As for Velcro, I prefer the strips that include a loop so that you can actually tighten them down rather than just rolls.