Windows DHCP Server on AWS – Creating Static IPv6 Addresses in AWS
I have a client that is currently in the process of migrating their network to IPv6. As part of this migration, they’ve opted to deploy with DHCPv6, and therefore need DHCPv6 servers. They’ve got DHCP(v4) running in a different environment on Windows 2019 server, but for a variety of reasons, cannot run the DHCPv6 process on those same servers and went ahead with deploying the DHCPv6 servers into AWS.
At first, the DHCP server process went like any other install. We weren’t aware that it wasn’t working until we validated all other pieces of the network and then via Wireshark that there was an issue. In Wireshark on the DHCP server, we saw “Port Unreachable” packets being returned to the gateway.
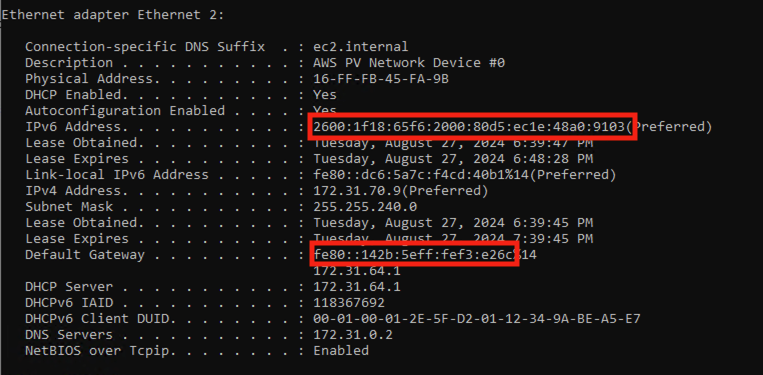
We ran “netstat -a” to find that the DHCP server process was not binding to the DHCPv6 ports (UDP 546 and UDP 547).
Running the command “Get-DhcpServerv6Binding” returned no data. This same information is accessible in the DHCP server management window. To access the DHCP server bindings through the DHCP management window, expand the server in the left pane, expand “IPv6” and then right click on “IPv6”, select “Properties”, click “Advanced”, click “Bindings” next to “Change server connection bindings”. Before the change this is empty. The good news is this window does provide some insight into the issue. The DHCP server process can only bind to a statically assigned address configured in Windows. In fact, this issue is present for both IPv4 and IPv6 addresses.


Trying to configure a static address in the Network Adapter properties results in the server refusing to accept the address. When you click save and back out, once you go back in or check with ipconfig, the only address configured is the one assigned via the AWS console. With IPv6, you can configure multiple IPv6 addresses via the AWS console, but this doesn’t allow the DHCP server process to bind to them, because they are assigned dynamically.
The answer to this is found in this AWS re:Post article on assigning a static IP address to an EC2 Windows Instance. This particular article is aimed at IPv4 addresses but is equally valid for IPv6 addresses.
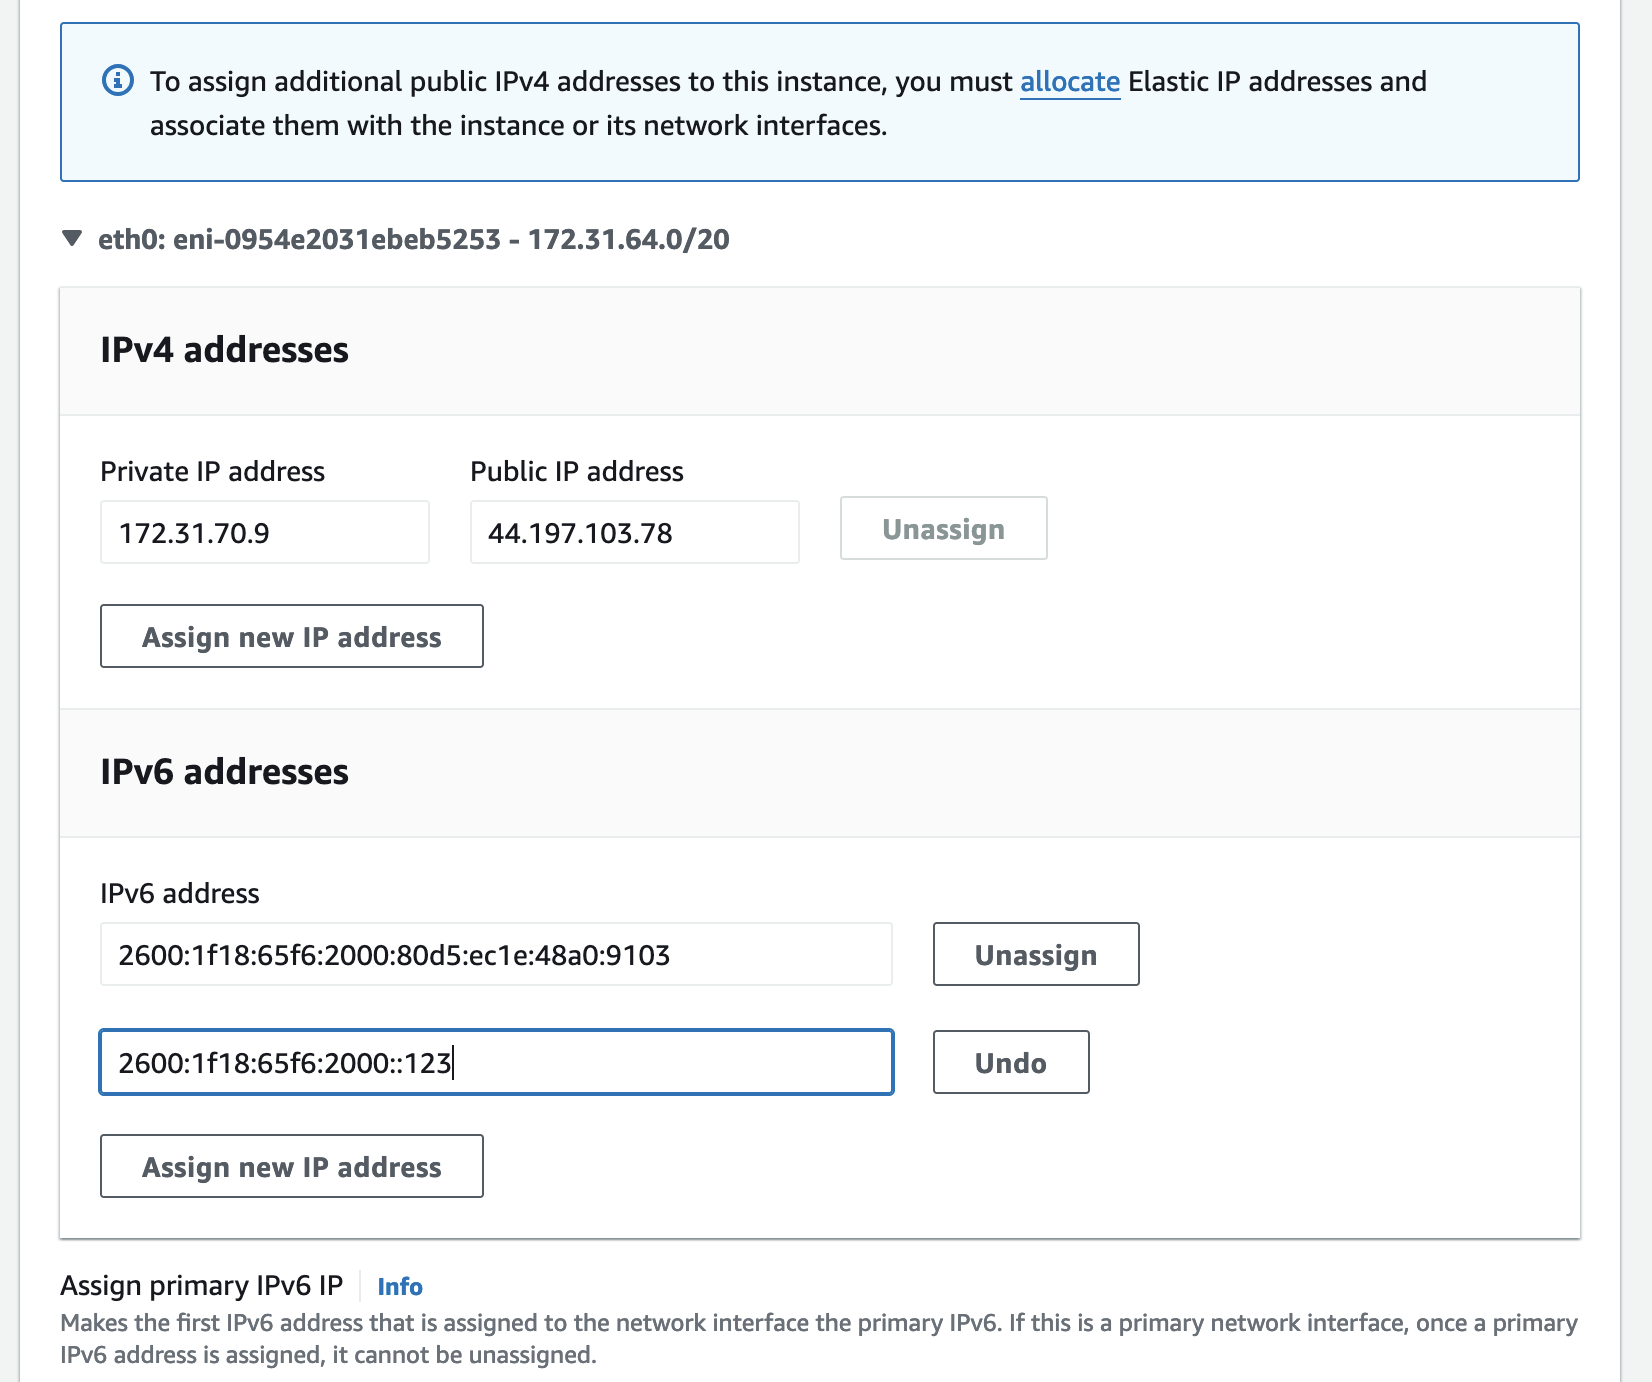
If the server doesn’t already have an auto-assigned IPv6 address configured, assign that in the AWS console before starting. We’re going to configure a static address, but to begin, it cannot be assigned yet.

Log into the Windows Server
Open the command prompt window and enter “ipconfig/all”
Open “Network and Sharing Center”, click “Change Adapter Settings”
Right click on the appropriate adapter, click “Properties”
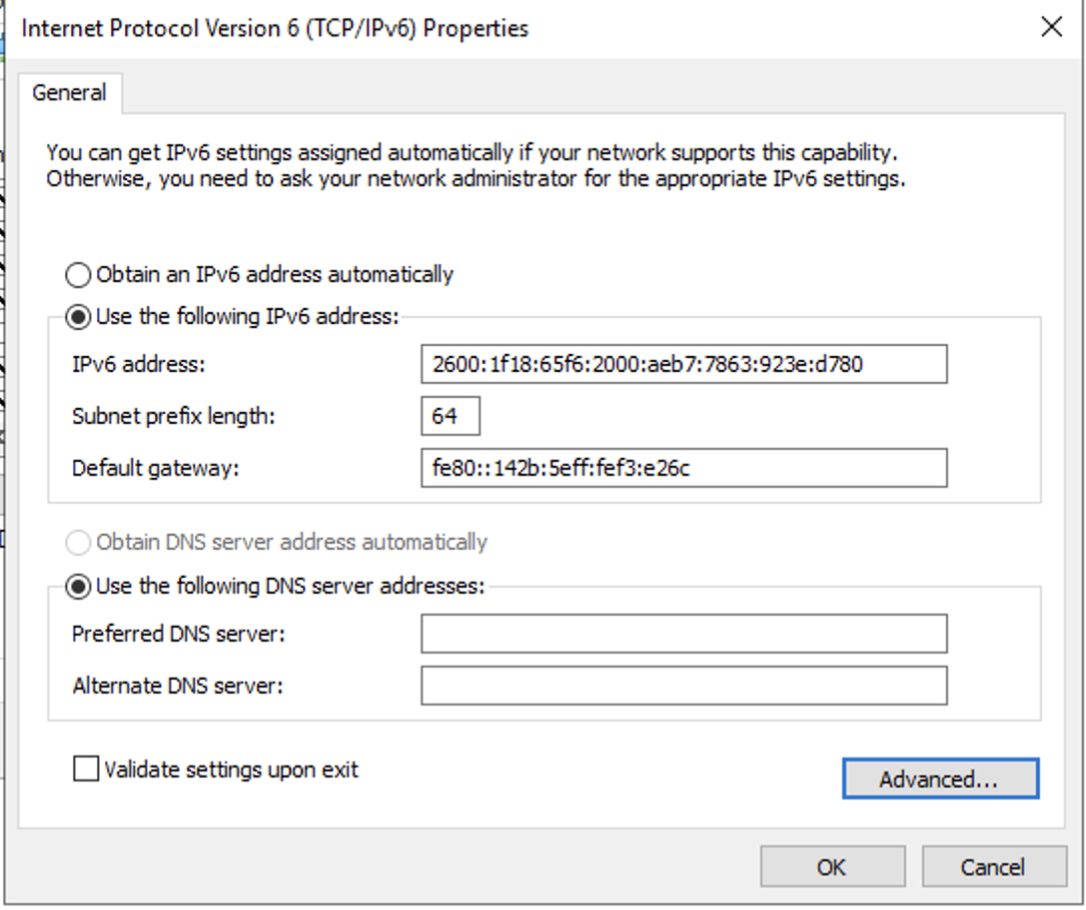
Click “Internet Protocol Version 6 (TCP/IPv6)”, then click “Properties”
Take the values that from the output of ipconfig and enter them here
Click “Advanced”
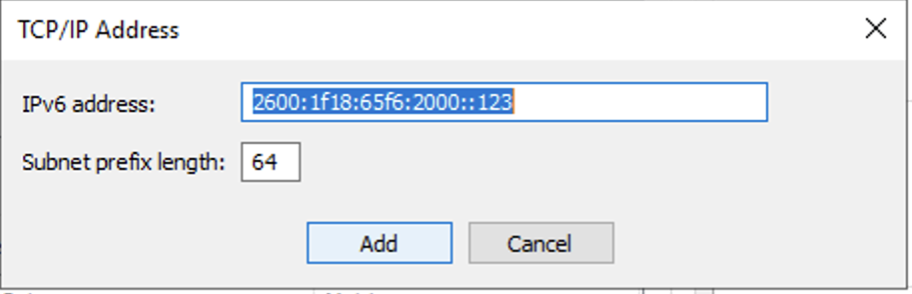
Under “IP addresses”, click “Add”, enter the static IPv6 address that you’d like to assign to the server. Click “Add”, “Ok” on the previous screen, and “Ok” to back out of the interface properties screen.
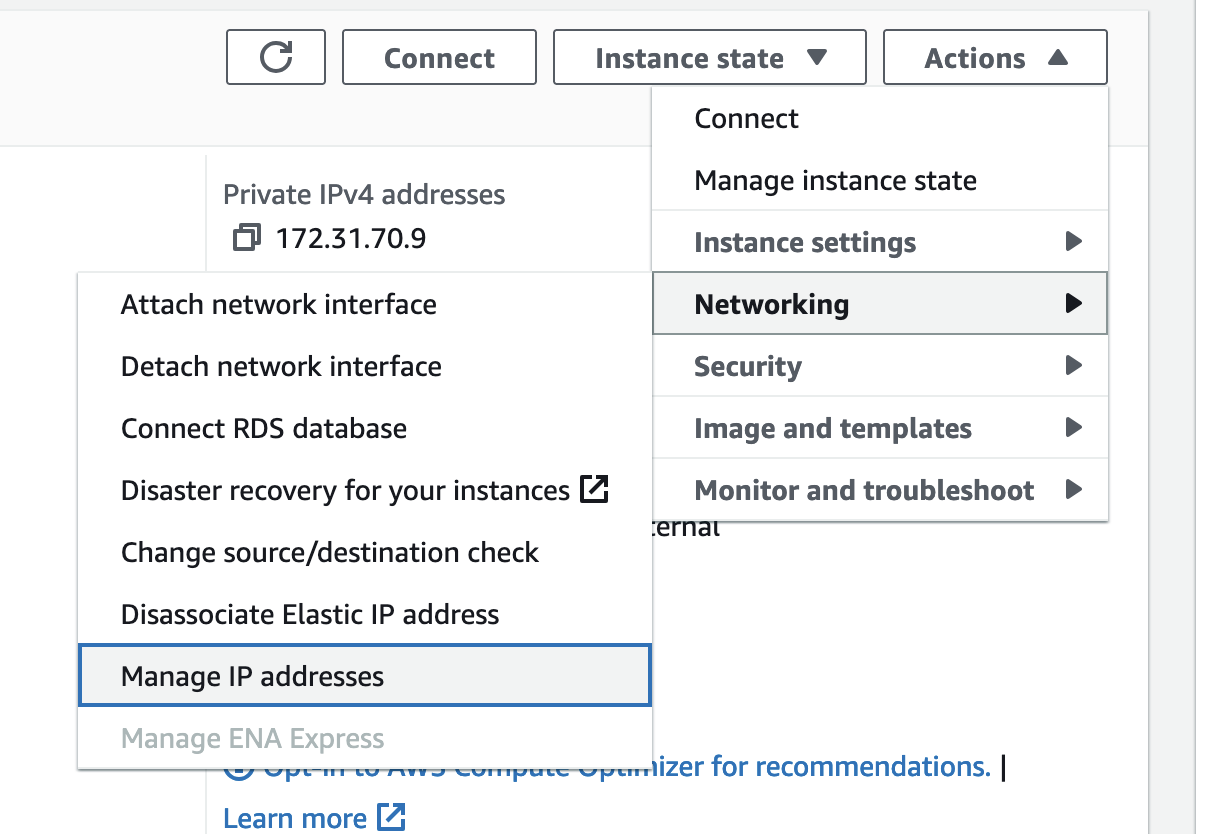
Go back to the AWS console, select the EC2 instance, click “Actions”, select “Networking”, and then select “Manage IP Addresses”.
Assign the address set statically in step 8, click “Save”
If you’re running into this problem with IPv4, select “Internet Protocol Version 5 (TCP/IPv4)” in step 4 instead.

In PowerShell, we can use the command “Get-DhcpServerv6Binding” to validate that the service is binding to the static IPv6 address we configured.
It may seem odd that you need to assign the address in the AWS console after it’s configured in Windows, but I have tested this and if you assign this second address in AWS first, Windows will not save it as a static address. If you don’t assign the address in the AWS console, the network fabric will not learn the address and will not be able to forward traffic to the server.